Agriculture
March 7, 2024
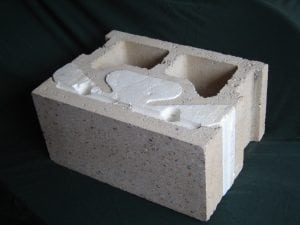
NRG Insulated Block
Read SolutionImplemented by
Francis Kennedy
Updated on March 13, 2024
·Created on September 1, 2021
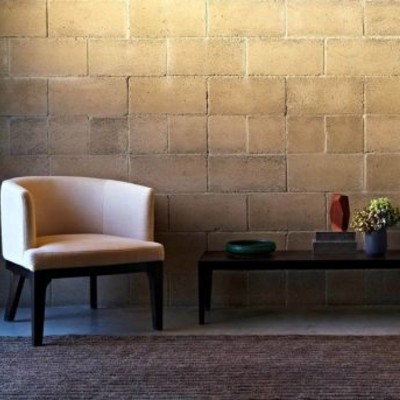
Watershed Blocks are alternatives to building blocks made of recycled materials using less cement.
Watershed Materials has developed a technology to use up to 100% locally sourced recycled material as aggregate for an alternate masonry block. They use post-industrial recycled materials – without washing or intense processing – to produce masonry blocks. Watershed Materials technology incorporates no colorants, dyes, or artificial pigments. Surface finishes are not required, eliminating concerns over volatile organic compounds (VOCs) and other harmful coatings. The technology allows for natural clay found readily all over the planet to be turned into sustainable masonry products.
Target SDGs
SDG 11: Sustainable Cities and Communities
SDG 12: Responsible Consumption and Production
Target Users (Target Impact Group)
Household, Small and Medium-sized Enterprises
Distributors / Implementing Organizations
Watershed Materials distribute the product
Competitive Landscape
Direct competitors include Interlocking Stabilized Soil Blocks (ISSB), RePlast, NRG Insulated Block, and Blockwalls Concrete.
Regions
Worldwide
Manufacturing/Building Method
Watershed Block is produced in San Francisco Bay Area, CA, USA
Intellectural Property Type
Patent
User Provision Model
The manufacturer provides the customers with the blocks, directly. The blocks are intended to be used within a 250-mile radius of the San Francisco Bay Area. However, with carbon offset credits, it can be transported worldwide.
Distributions to Date Status
Stanford Lasuen, Sonoma Residence, and Napa Residence are examples of using this product in real-life scenarios.
Unit dimensions (cm)
Available in several dimensions
Primary materials
Natural Geo-polymers, Lime, and Slag
Complimentary materials
Natural Aluminosilicates, and Rice Husk
Fire Resistance (hr)
Unknown
Thermal Insulation Capacity
0.81–0.93 W/m°C
Compressive Strength (MPa)
9~13 MPa
Suitable Climates
All Climates
Design Specifications
There are six different block types manufactured that vary in their shape and dimensions. 3 are regular blocks, 2 are bond-beam blocks, and the last one is a cap for the blocks.
The entire process for using the material for installation is explained below:
Preparation
1. Establish lines, levels, and coursing
2. Surface preparation
3. Layout
Construction
1. Coursing and bonding
2. Mixing and placing mortar
3. Placing masonry units
4. Adjustments
5. Anchorage
6. Control
7. Sealing Joints
8. Grout Placement
9. Cleaning
Technical Support
Unknown
Replacement Components
The entire block is replaceable.
Lifecycle
Unknown
Manufacturer Specified Performance Parameters
The manufacturer aims to reduce the cement use by 100% and use up to 100% locally-sourced recycled materials to manufacture the blocks.
Vetted Performance Status
There is no explicit information on third party organization testing, however the manufacturer requires users as per the specification to test the units according to ASTM C140/140M-14, ASTM C90-14 and ASTM C426-10 and to send back in the event of any defect in the units.
Safety
No known safety hazards are related to this product.
Complementary Technical Systems
None
Academic Research and References
Easton, T., 2015, “Zero Cement Masonry Using Lime, Slag, and Natural Aluminosilicates,” Watershed Material LLC
Easton, T., 2015, “Understanding Ancient Geopolymers Used in Egyptian Pyramids to Modernize Contemporary Concrete Masonry,” Watershed Material LLC
Easton, T., 2014, “Learning from Ancient Roman Concrete to Improve Modern Masonry,” Watershed Material LLC
Easton, T., 2014 “Reducing Cement Content in Masonry with Rice Husk Ash, a Promising Supplementary Cementitious Material,” Watershed Material LLC
Compliance with regulations
The manufacturer tested the product based upon The Masonry Society (TMS) standard TMS 602, a CSI-format, three-part specification as adapted by the American Concrete Institute (ACI), and incorporated by reference in the California Building Code (CBC).
Other Information

Agriculture
March 7, 2024
Implemented by
Francis Kennedy
Agriculture
March 4, 2024
Implemented by
Makiga Engineering Services LTD
Agriculture
February 26, 2024
Implemented by
Advanced Earthen Construction Technologies (AECT)
Agriculture
February 26, 2024
Agriculture
February 27, 2024
Implemented by
California Institute of Earth Architecture (CalEarth)
Agriculture
February 29, 2024
Implemented by
EarthEnable
Agriculture
March 6, 2024
Implemented by
ReMaterials
Agriculture
March 8, 2024
Implemented by
ByFusion
Agriculture
August 16, 2024
Implemented by
Green Pavers
Agriculture
March 14, 2024
Implemented by
Hempitecture Inc.
Have thoughts on how we can improve?
Give Us Feedback